Introduction
Configuration BIOS OMLEX.
-
-
Enter BIOS click DELETE.
-
-
-
Configure CPU
-
-
-
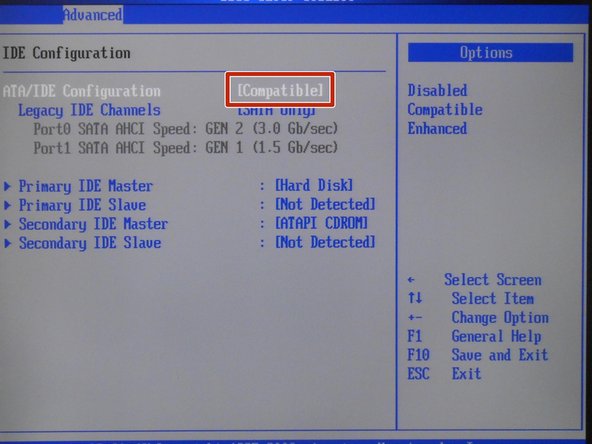
Select COMPATIBLE
-
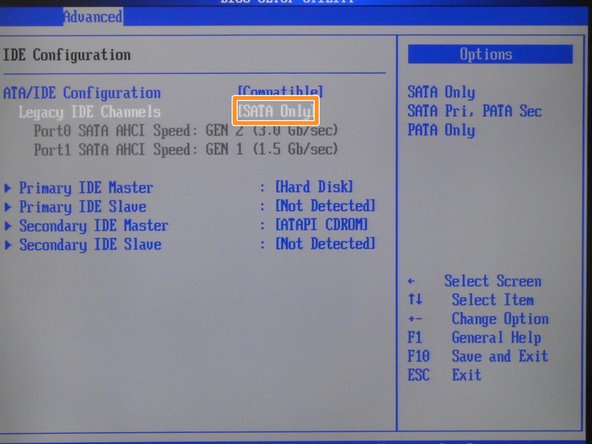
Select SATA Only
-
-
-
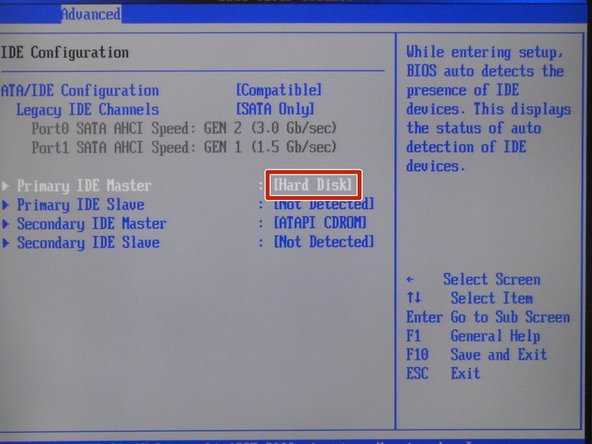
Select Hard Disk
-
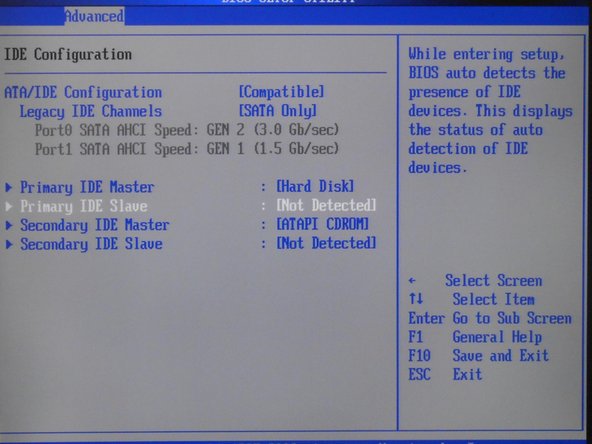
Select as in the photo
-
-
-
Insert wisdom here.
-
-
-
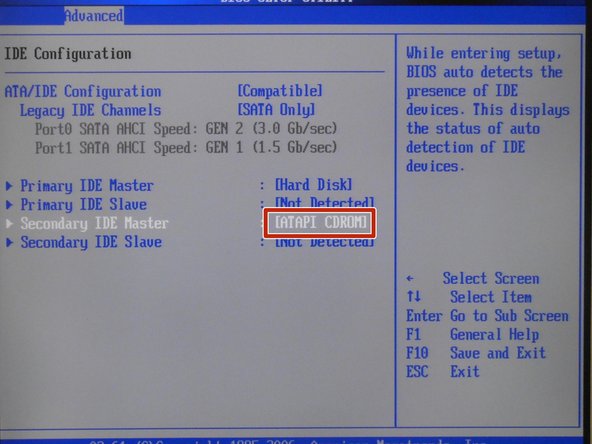
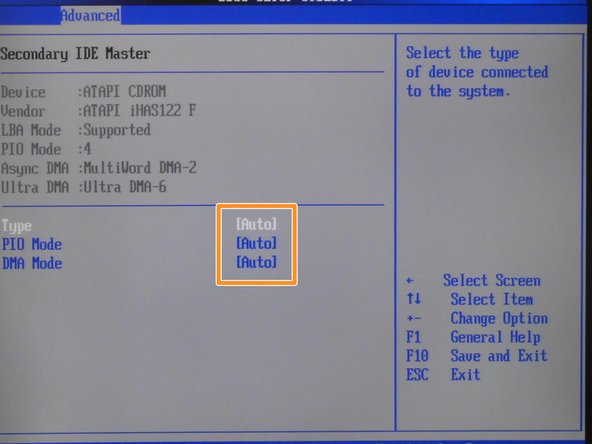
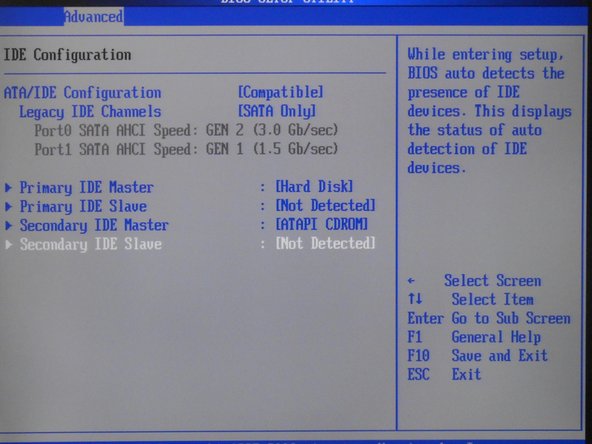
Select ATAPI CDROM
-
Select as in the photo
-
-
-
Insert wisdom here.
-
-
-
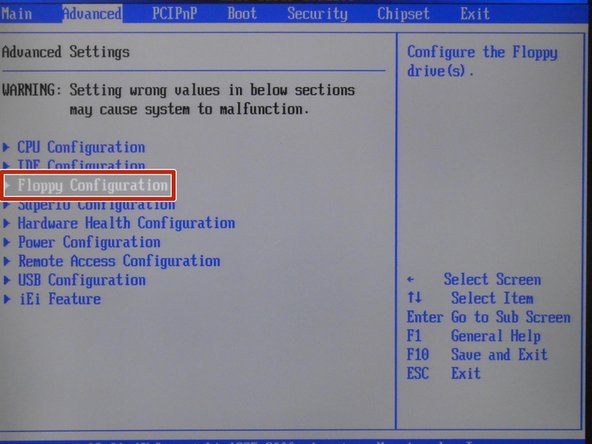
Select Floppy Configuration
-
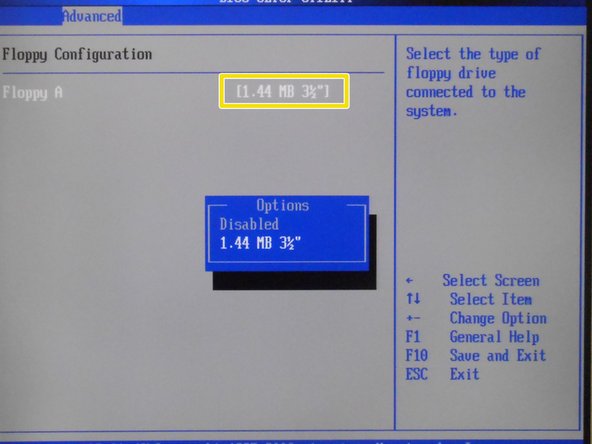
Select 1.44 MB ...
-
-
-
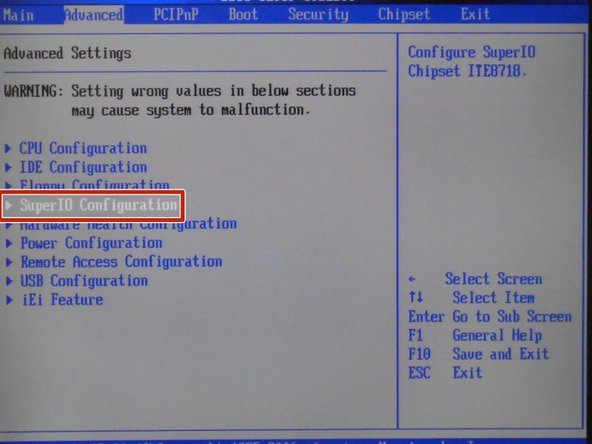
Select Super ID Configuration
-
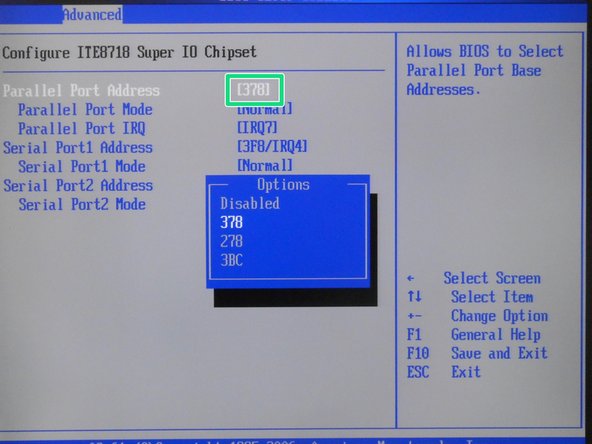
Select 378
-
-
-
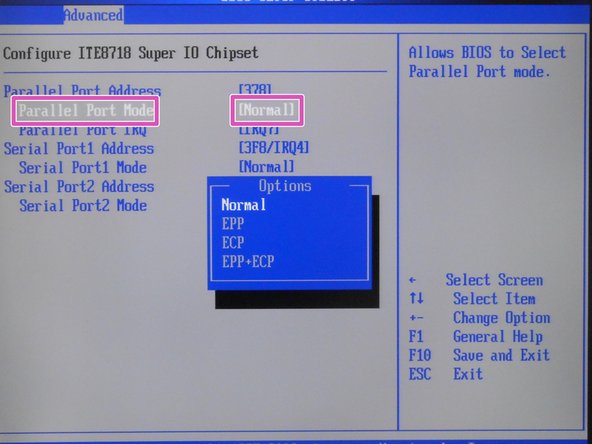
Select Normal
-
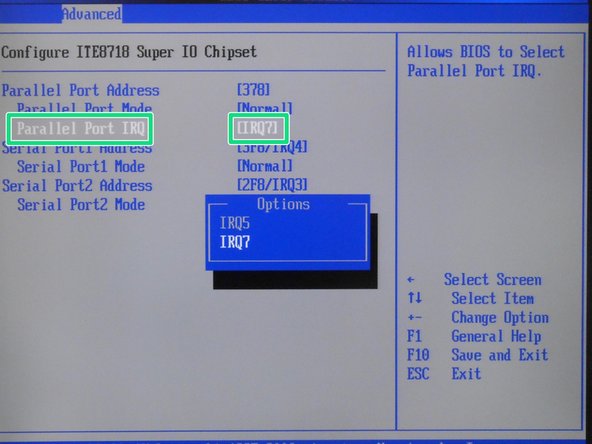
Select IRQ7
-
-
-
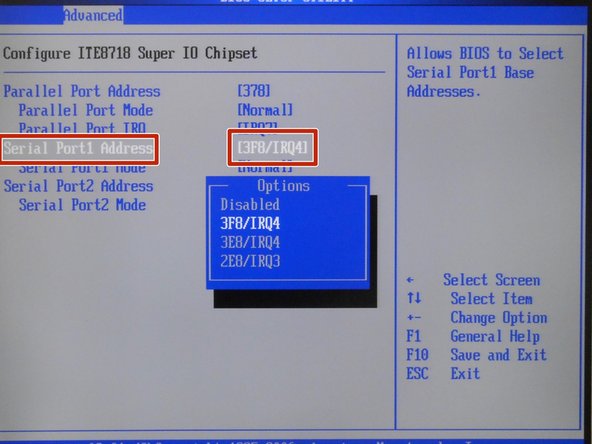
Select 3F8/IRQ4
-
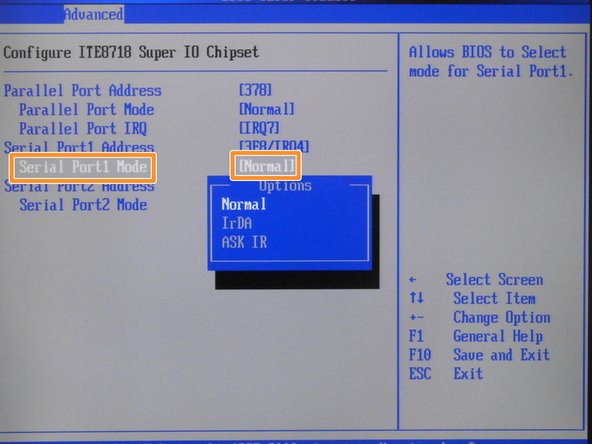
Select Normal
-
-
-
Select 2F8/IRQ3
-
-
-
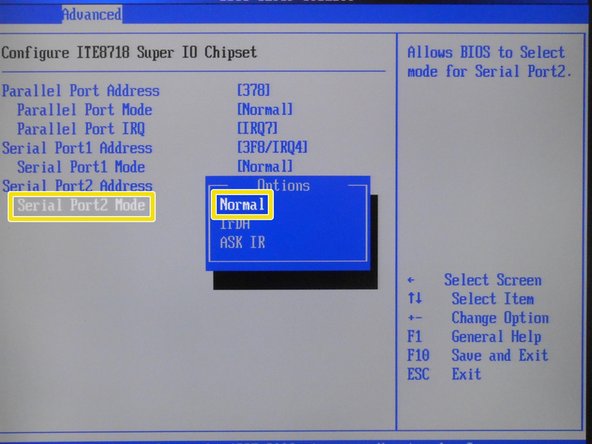
Select Normal
-
-
-
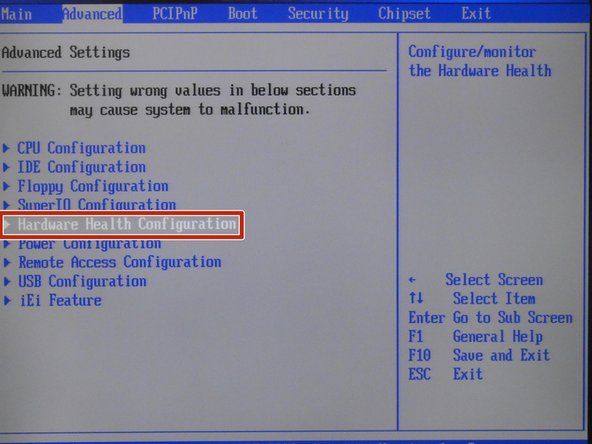
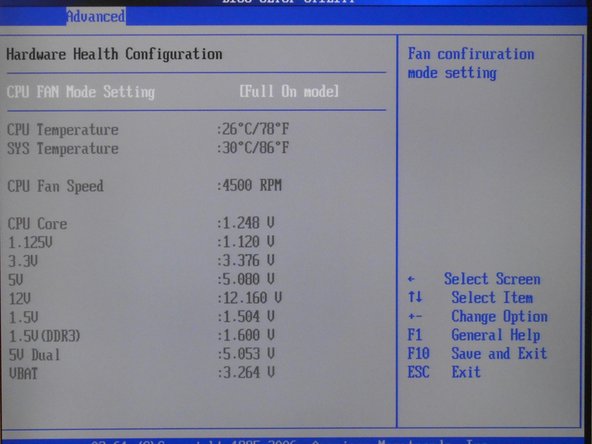
Select Hardware Health Configuration
-
-
-
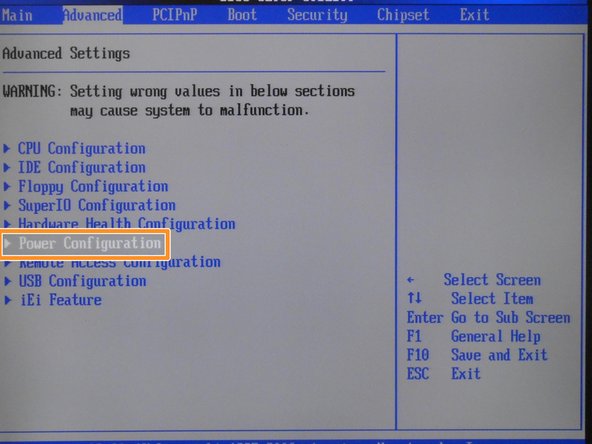
Select Power Configuration
-
-
-
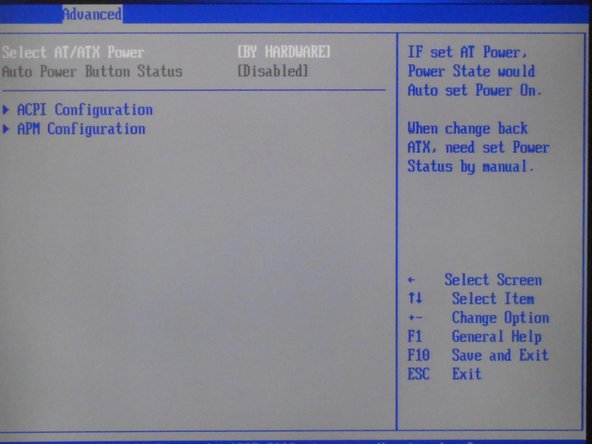
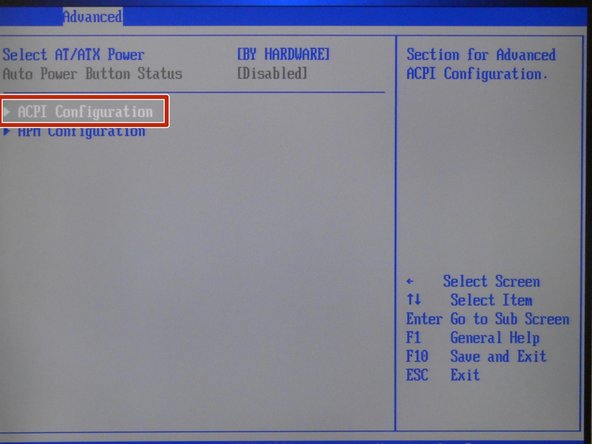
Select ACPI Configuration
-
-
-
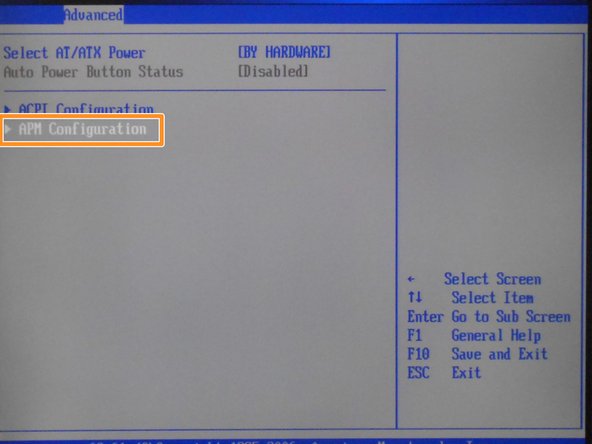
Select APM Configuration
-
-
-
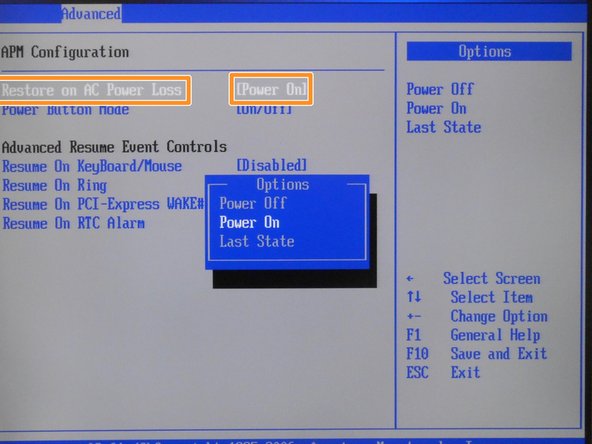
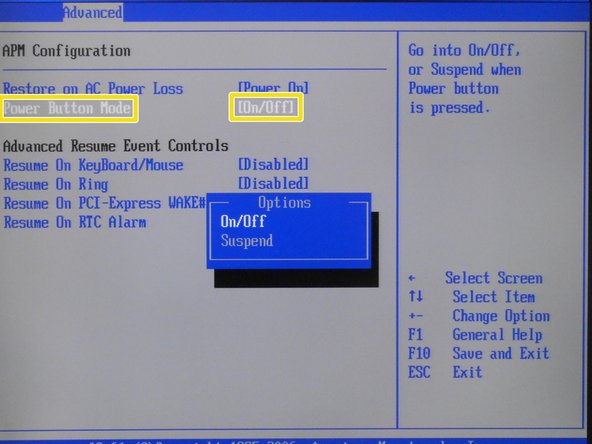
APM Configuration Step 17
-
Select Power On
-
Select On/Off
-
-
-
Select Disabled
-
Select Disabled
-
-
-
Select Disabled
-
Select Disabled
-
-
-
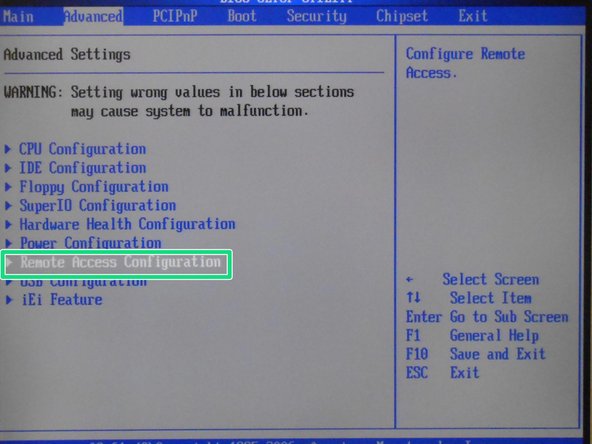
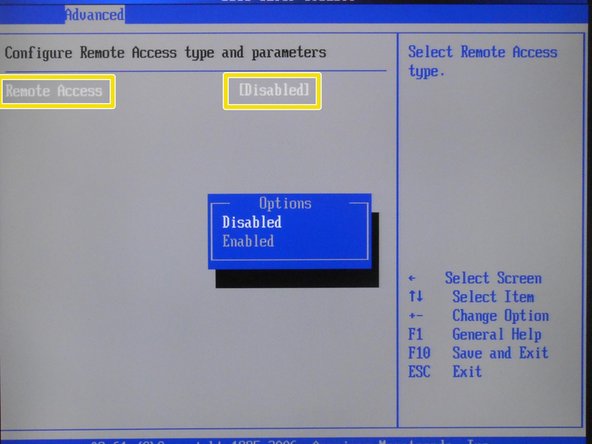
Select Remote Access Configuration
-
Select Disabled
-
-
-
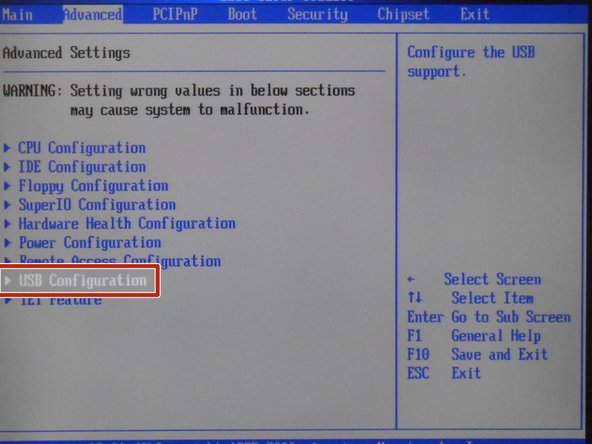
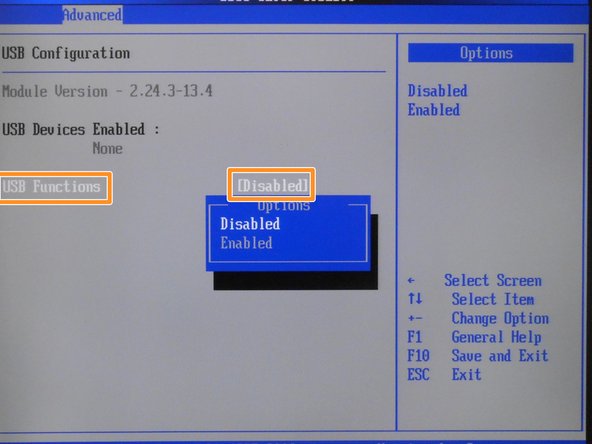
Select USB Configuration
-
Select Disabled
-
-
-
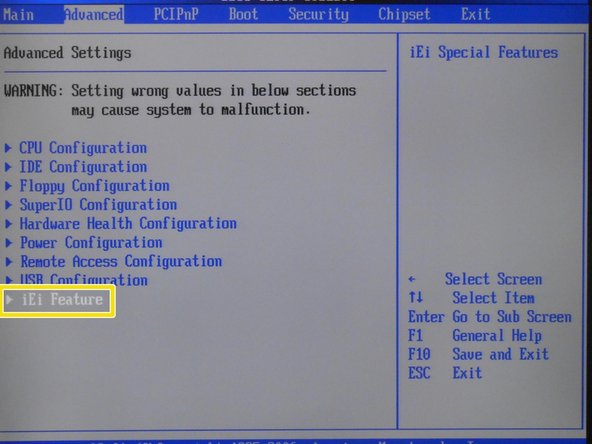
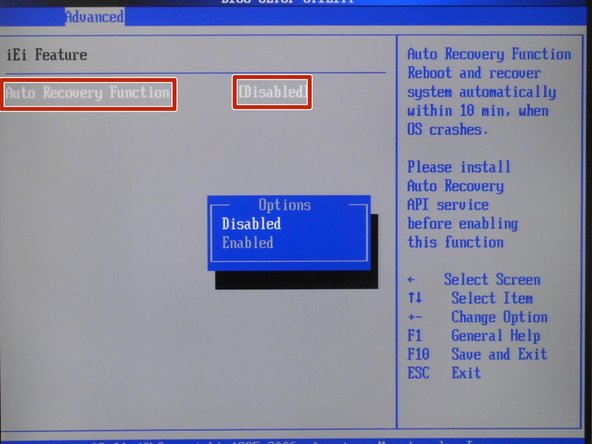
Select iEi Feature
-
Select Disabled
-
-
-
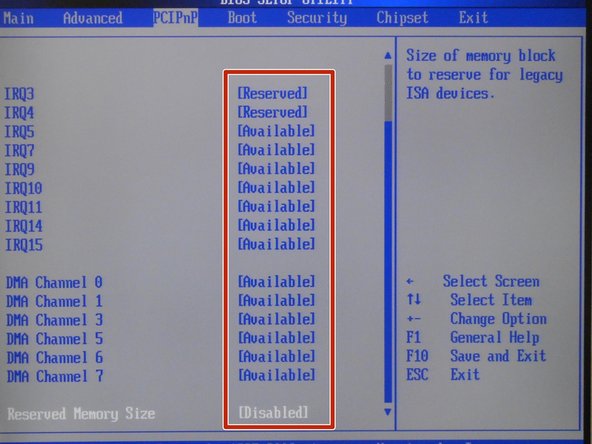
Select everything as it is in the picture
-
-
-
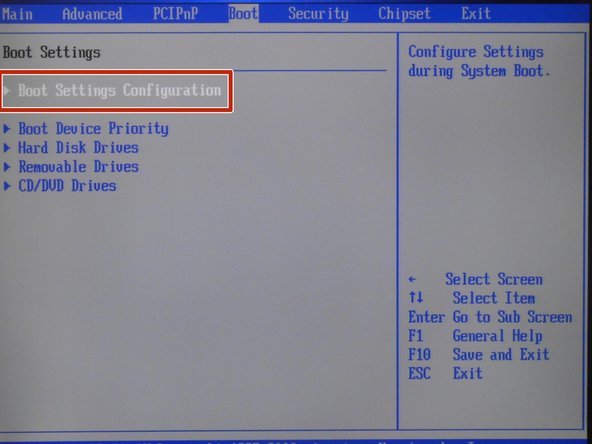
Select Boot Settings Configuration
-
-
-
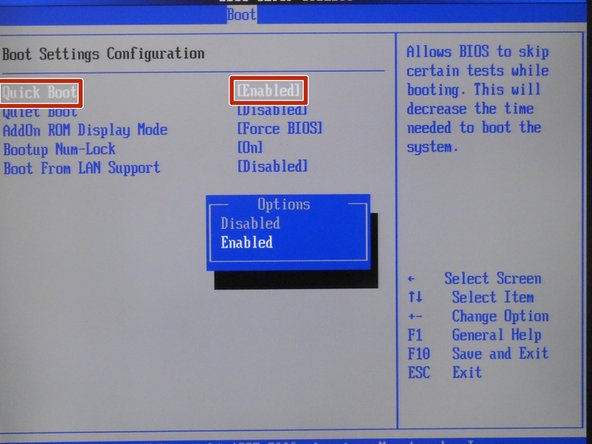
Select Enabled
-
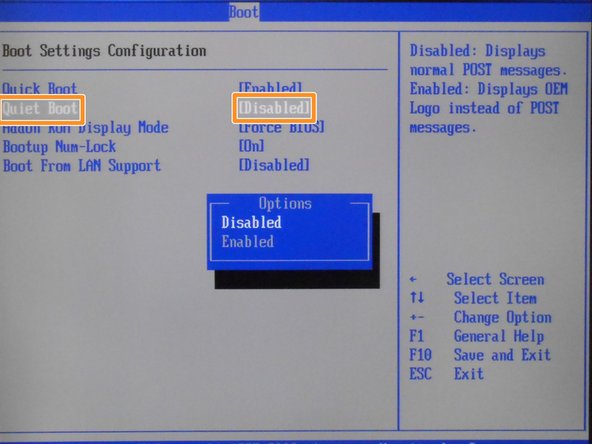
Select Disabled
-
-
-
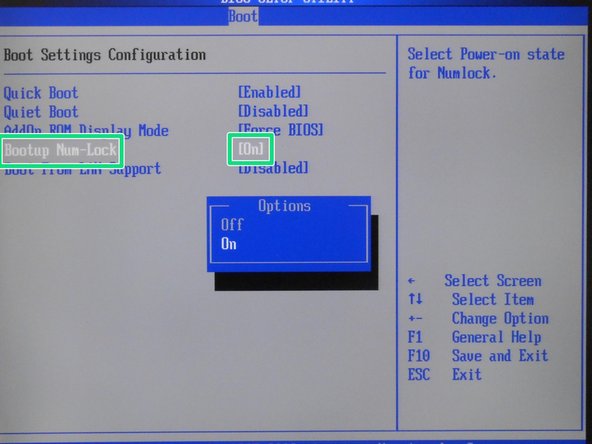
Select Force BIOS
-
Select On
-
-
-
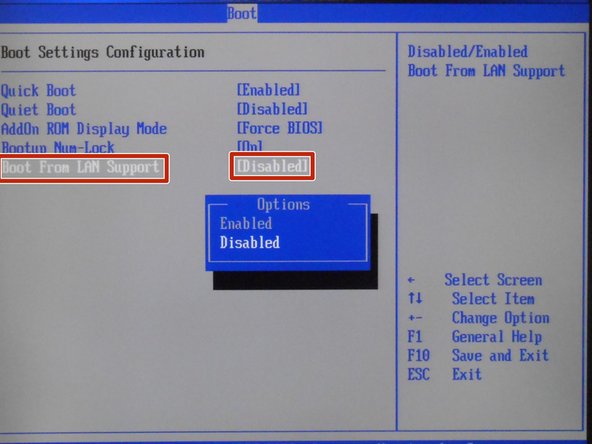
Select Disabled
-
-
-
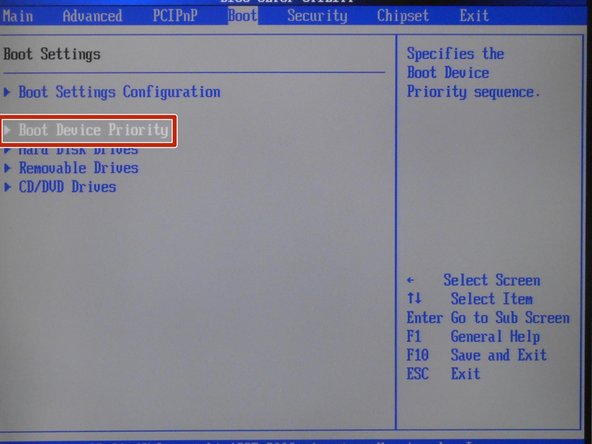
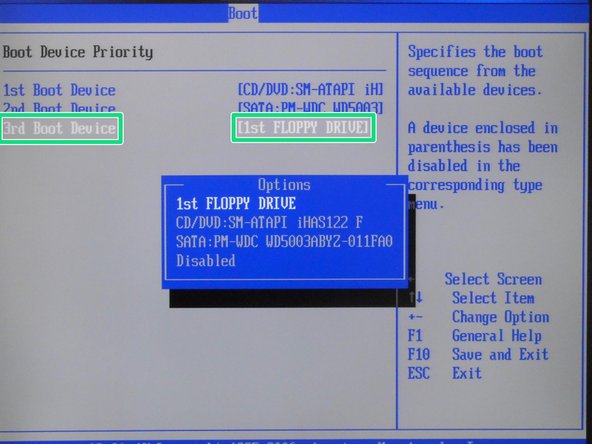
Select Boot Device Priority
-
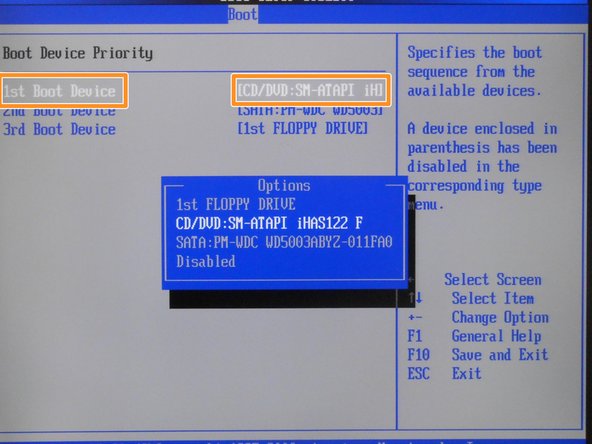
Select CD7DVD-SM-ATAPI iHAS122 F
-
-
-
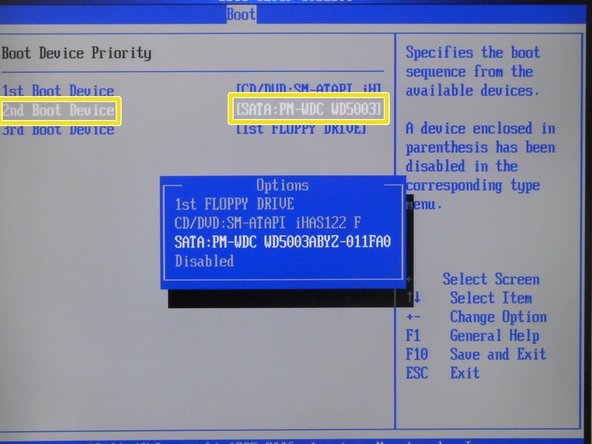
Select SATA: PM-WDC WD5003ABYZ-011FA0
-
Select 1st FLOPPY DRIVE
-
-
-
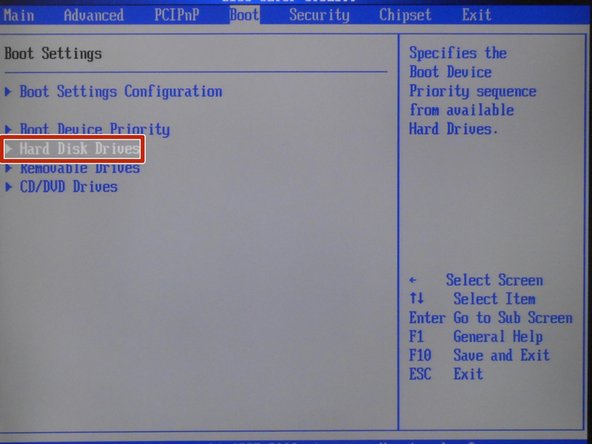
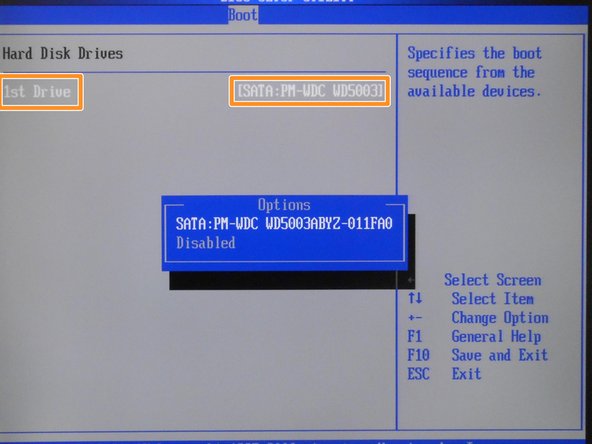
Select Hard Disk Drives
-
Select SATA:PM-WDC WD5003ABYZ-011FA0
-
-
-
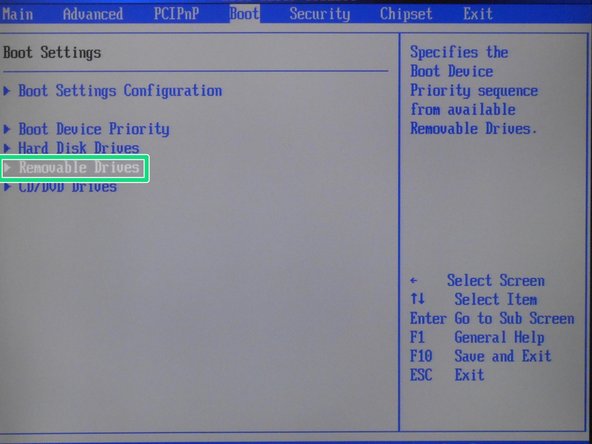
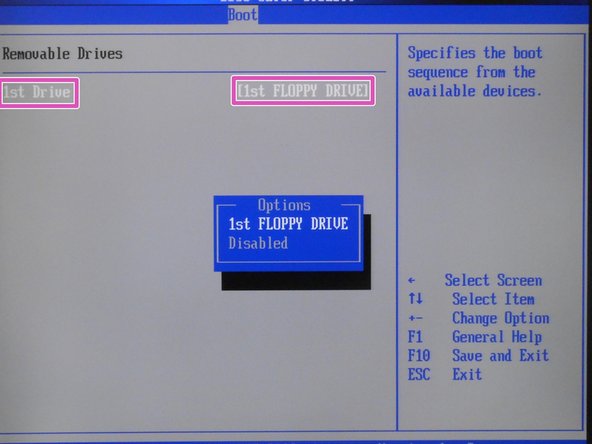
Select Removable Drives
-
Select 1st FLOPPY DRIVE
-
-
-
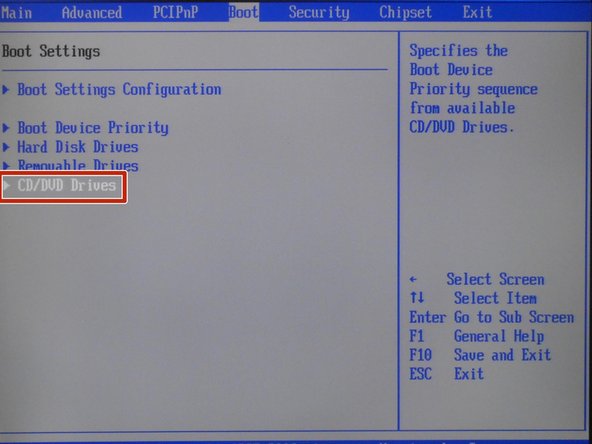
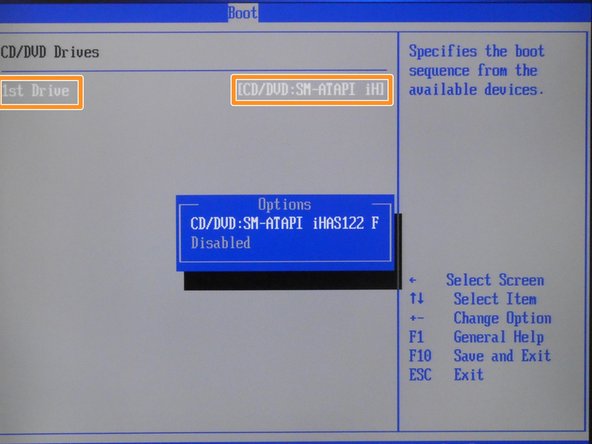
Select CD/DVD Drives
-
Select CD/DVD: SM-ATAPI ....
-
-
-
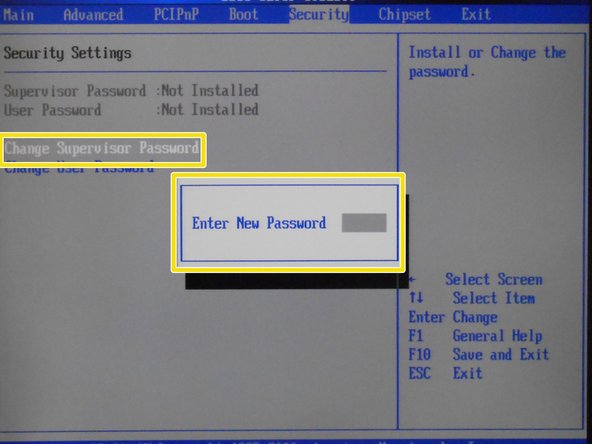
Select Change Supervisor Password
-
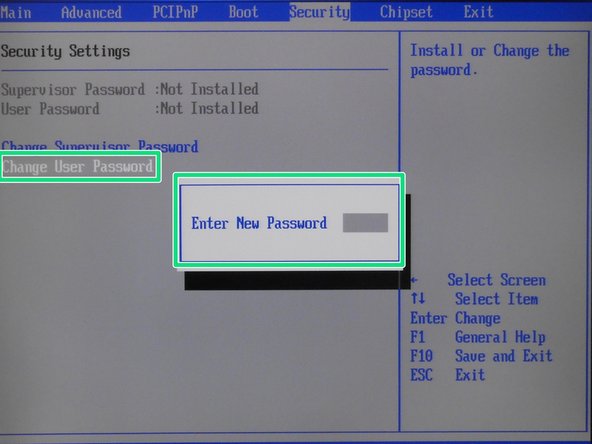
Select Change User Password
-
-
-
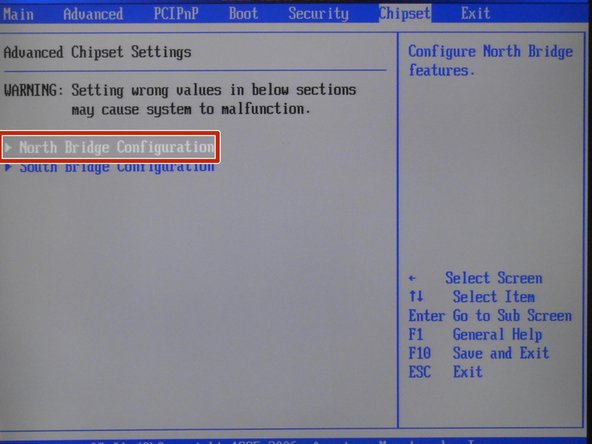
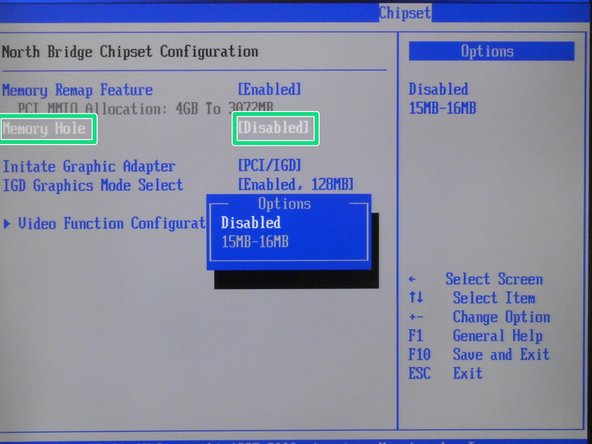
Select North Bridge Configuration
-
-
-
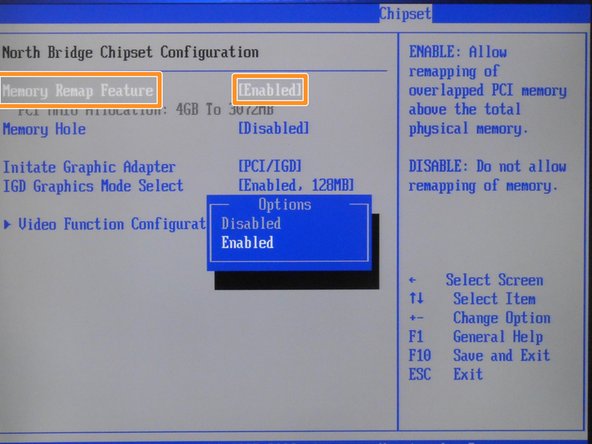
Select Enabled
-
Select Disabled
-
-
-
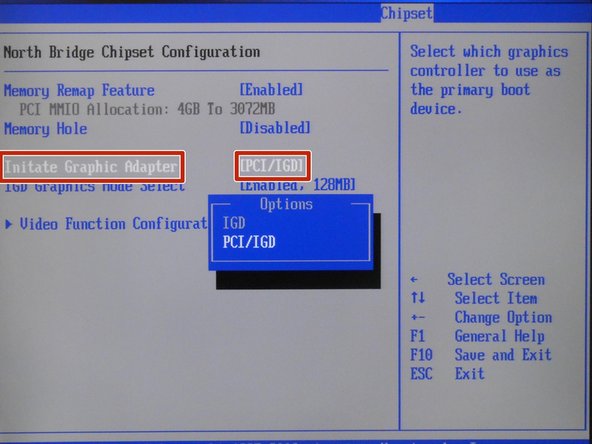
Select PCI/IGD
-
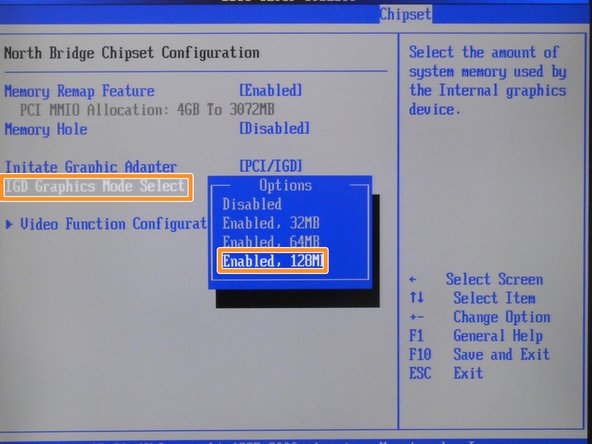
Select Enabled. 128MB
-
-
-
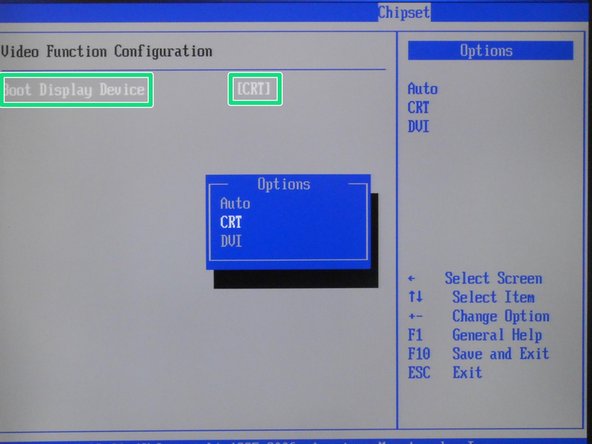
Select Video Function Configuration
-
Select CRT
-
-
-
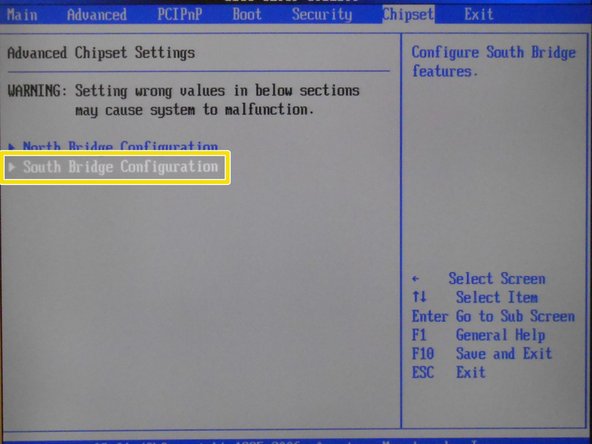
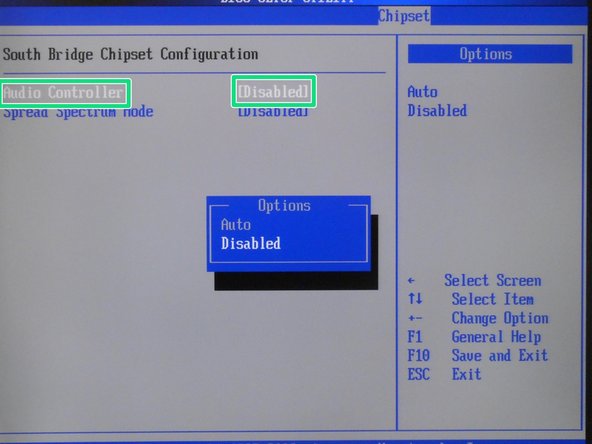
Select South Bridge Configuration
-
Select Disabled
-
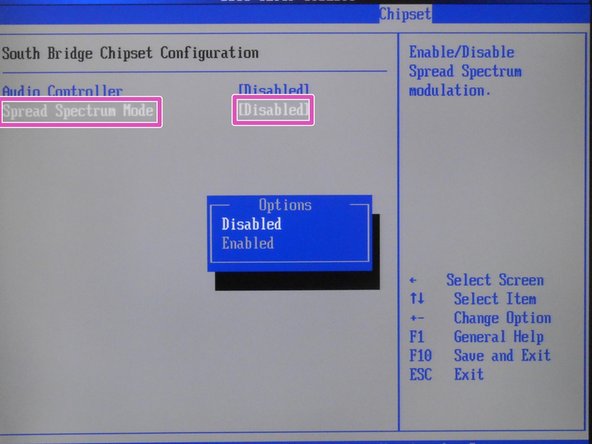
-
-
Select Disabled
-
-
-
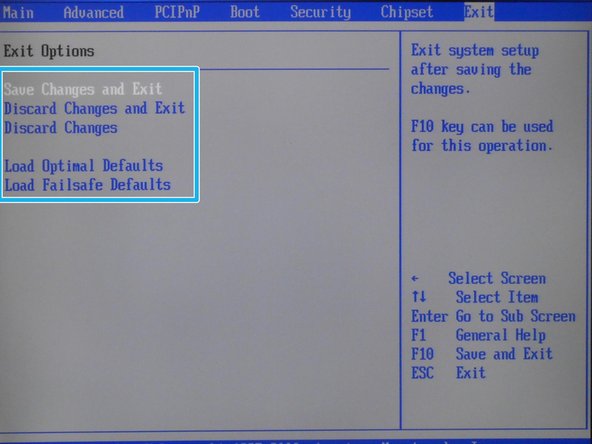
Exit Options
-