Introduction
This guide is describing use of SCO scoadmin program to setup mount /volumes/bmprint remote drive on your OT computer.
-
-
Switch user on local console.
-
Please note character "-" on command line - this load right environment for root user
-
From remote computer use telnet connection
-
Start scoadmin program
-
-
-
SCO Admin - File Manager
-
Select FileSystems
-
Open Filesystem Manager
-
Use TAB and arrows on your keyboard to move between the fields
-
-
-
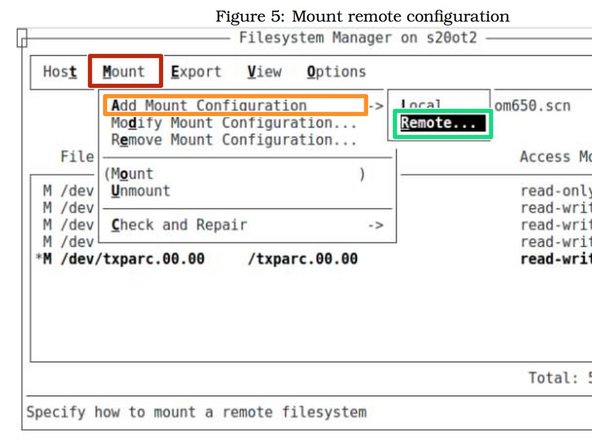
Select Mount from menu
-
Scroll down and select "Add Mount Configuration"
-
Choose remote
-
Use TAB and arrows on your keyboard to move between the fields
-
-
-
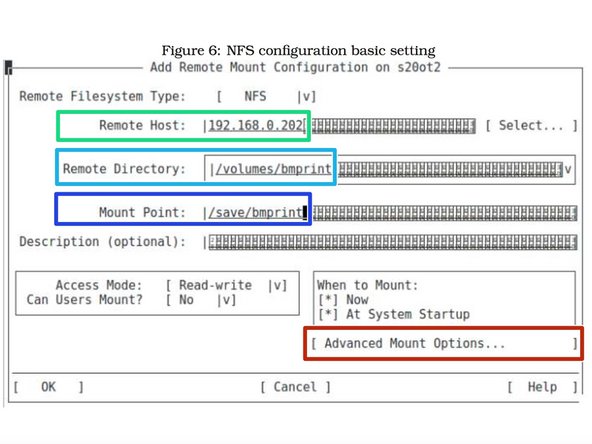
Enter IP address of your printer server
-
Enter name of remote directory of your print server
-
Enter name of local directory on computer you are configuring
-
Don't forget Advanced Mount Option - Failure to configure these correctly might stop your server in case of printer server shutdown
-
-
-
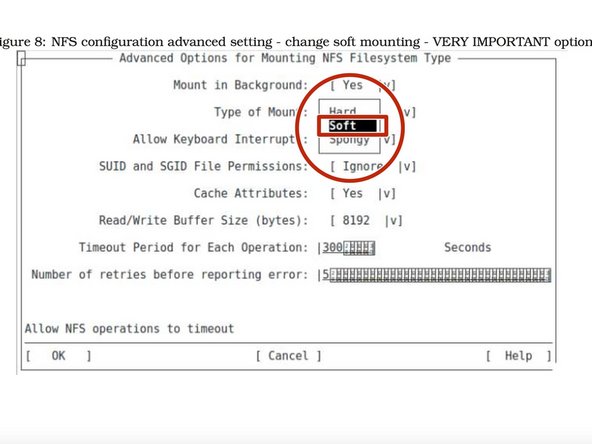
This is very important option to be selected !
-
Select Soft option in the type of mount
-
Use TAB and arrows on your keyboard to move between the fields
-
This option dictate what should happen in case of remote share become unavailable:
-
Hard - Computer will restart
-
Soft - Nothing
-
Spongy - No idea
-
-
-
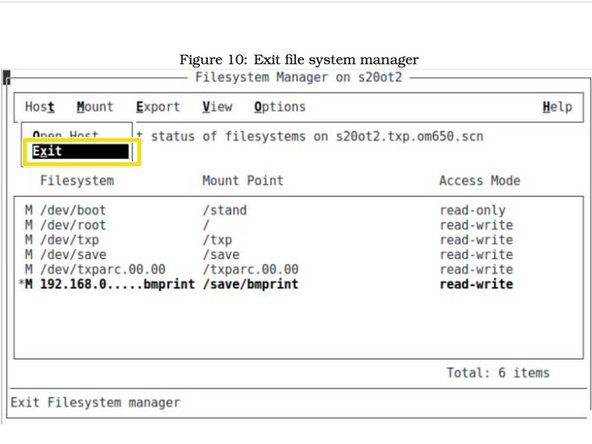
Select mount menu to see mounted drives.
-
The remote NFS share should indicate IP address and mounting point
-
Exit from Filesystem management program
-
System will ask for relinking kernel and default boot kernel - answer both questions yes.
-
Mounted NFS share can be seen by typing mount command.
-


